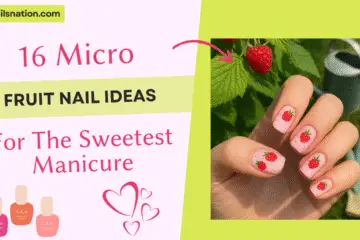
Hey, nail lovers! Get ready to add some fruity flair to your nails with these 11 sweetest strawberry nail art ideas! I’ve got adorable designs that’ll make your nails look as sweet as a summer strawberry patch. Let’s dive into these juicy looks—you’ll love them!

Strawberry nail art is all about cute vibes and bright colours! These designs bring a playful, summery feel with reds, pinks, and greens that pop. They’re super easy to do at home, so let’s get started on these berry cute ideas!
1. Strawberry Nails French Tip
These strawberry nails French tip designs give a classic mani a fruity twist! A nude base with red tips and tiny green leaves makes your nails look fresh and summery. It’s a chic way to rock strawberries on your nails!
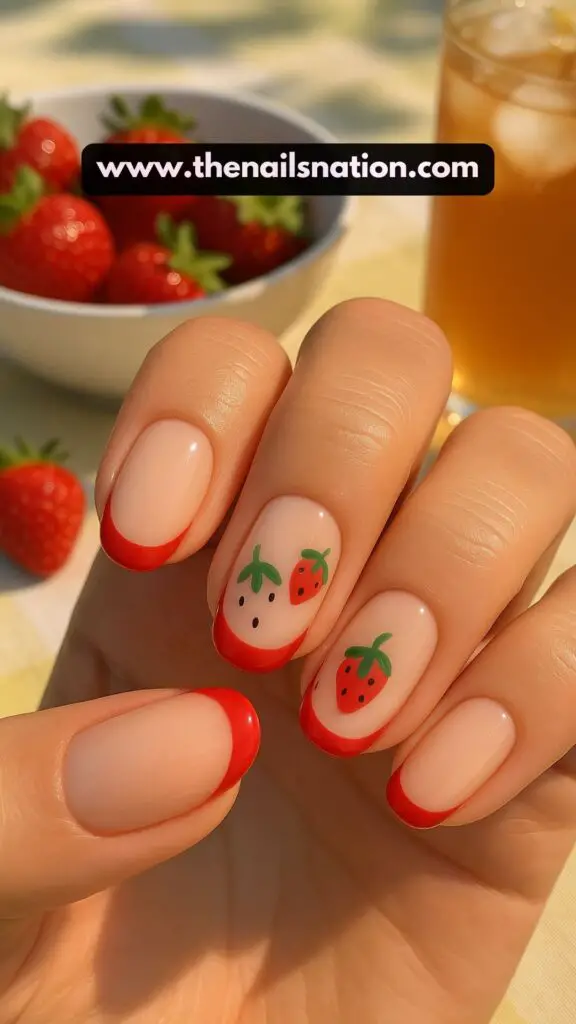
Tutorial: Start by applying a base coat, then paint your nails with a nude polish and let it dry completely. Use a thin brush to apply red polish to the tips for a French tip style, and once dry, add small green leaves at the base of the tips using a toothpick; dot on tiny black seeds on the red tips. Finish with a glossy top coat to seal the design and add shine.
Best Occasions: Perfect for summer brunches or garden parties.
2. Strawberry Nails Short
Short nails get a sweet upgrade with these strawberry nails short designs! A bright red base with green leaves on the ring finger adds a cute fruity touch. They’re simple yet so charming for summer!

Tutorial: Apply a base coat, then paint your short nails with a bright red polish in two thin layers for even coverage, letting each layer dry. On your ring finger, use a toothpick to draw a green leaf at the base with a thin black stem; add small white dots on the red polish for seeds using a toothpick. Seal everything with a glossy top coat for a polished look.
Best Occasions: Great for picnics or casual summer outings.
3. Simple Strawberry Nail Art
This simple strawberry nail art is perfect for beginners! A pink base with a single red strawberry on the ring finger keeps it easy and adorable. It’s a quick way to add some fruity flair!

Tutorial: Start with a base coat, then apply a light pink polish to all nails and let it dry fully. On your ring finger, use a small brush to paint a red strawberry shape near the tip, adding a green leaf at the top with a toothpick; dot on tiny white seeds on the strawberry. Finish with a glossy top coat to protect the design and add shine.
Best Occasions: Awesome for everyday wear or summer coffee dates.
4. Cute Strawberry Nails
These cute strawberry nails are absolutely darling! A white base with red strawberries and green leaves on the ring and middle fingers is pure sweetness. They’ll make your nails look as sweet as a strawberry dessert!

Tutorial: Apply a base coat, then paint your nails white and let them dry completely. On your ring and middle fingers, use a small brush to paint two red strawberries with green leaves at the top; add tiny yellow seeds with a toothpick for a realistic touch. Seal with a glossy top coat to keep the design vibrant and shiny.
Best Occasions: Perfect for baby showers or girls’ day out. You can also check – Fruity Nail Art Designs
5. Pink Strawberry Nails
These pink strawberry nails are a girly dream! A hot pink base with a red strawberry and white seeds on the ring finger adds a playful fruity pop. It’s a fun and flirty look for summer!

Tutorial: Start with a base coat, then apply a hot pink polish to all nails in two thin layers, letting each layer dry. On your ring finger, use a toothpick to draw a red strawberry with a green leaf at the top near the base; add small white seeds on the strawberry for detail. Finish with a glossy top coat to seal and add a shiny finish.
Best Occasions: Great for summer parties or date nights.
6. 3D Strawberry Nail Art
These 3D strawberry nail art designs are so eye-catching! A nude base with a raised red strawberry, green leaves, and tiny yellow seeds on the ring finger adds a fun texture. It’s a bold way to rock strawberries on your nails!

Tutorial: Apply a base coat, then paint your nails nude and let them dry fully. On your ring finger, use 3D nail gel to create a raised red strawberry shape, curing it under a UV lamp; add green leaves with a toothpick and dot on yellow seeds with a small brush. Seal with a glossy top coat, avoiding the 3D element, for a shiny finish.
Best Occasions: Perfect for fruit-themed parties or summer festivals.
7. Mini Strawberry Nail Art
These mini strawberry nail art designs are tiny but mighty! A pastel pink base with small red strawberries on the ring and index fingers is super cute. They’re perfect for a subtle fruity look!

Tutorial: Start with a base coat, then paint your nails pastel pink and let them dry completely. On your ring and index fingers, use a toothpick to draw two small red strawberries with green leaves at the top; add tiny white seeds on each strawberry for detail. Finish with a glossy top coat to protect the design and add shine.
Best Occasions: Awesome for picnics or casual summer outings.
8. Chocolate-Covered Strawberry Nail Art
These chocolate-covered strawberry nail art designs are deliciously chic! A red base with a brown chocolate drip on the ring finger mimics a yummy treat. It’s a sweet and stylish look for summer!

Tutorial: Apply a base coat, then paint your nails red and let them dry fully. On your ring finger, use a small brush to paint a brown chocolate drip from the tip downward, adding a green leaf at the top with a toothpick; dot on tiny white seeds on the red part. Seal with a glossy top coat for a shiny, delectable finish.
Best Occasions: Great for dessert parties or romantic dates.
9. Tiny Strawberry Nail Art
These tiny strawberry nail art designs are so delicate! A white base with a single tiny red strawberry on the ring finger adds a subtle fruity touch. It’s a minimalist look that’s still super sweet!

Tutorial: Start with a base coat, then apply a white polish to all nails and let it dry completely. On your ring finger, use a toothpick to draw a tiny red strawberry near the tip with a green leaf at the top; add a few white seeds for detail. Finish with a glossy top coat to seal the design and add a polished shine.
Best Occasions: Perfect for everyday wear or summer brunches.
10. Strawberry Toenail Art
Don’t forget your toes with this strawberry toenail art! A pink base with a red strawberry on the big toe is perfect for summer sandals. It’s a fun way to show off your fruity style!

Tutorial: Apply a base coat, then paint your toenails pink and let them dry fully. On your big toe, use a small brush to paint a red strawberry with a green leaf at the top near the base; add tiny yellow seeds with a toothpick for a realistic look. Seal with a glossy top coat to keep the design fresh and shiny.
Best Occasions: Great for beach days or flip-flop season.
11. Strawberry Fruit Nail Art
These strawberry fruit nail art designs are bursting with flavour! A red base with green leaves and white seeds on the ring finger makes your nails look like a fresh strawberry. It’s a bold and juicy look for summer!

Tutorial: Start with a base coat, then apply a bright red polish to all nails in two thin layers, letting each layer dry. On your ring finger, use a toothpick to draw a green leaf with a black stem at the base; add white seeds across the nail to mimic a strawberry’s texture. Finish with a glossy top coat for a vibrant, fruity finish.
Best Occasions: Awesome for farmers’ markets or summer picnics.
Quick Tips to Nail It
Start Clean: Make sure your nails are clean and shaped before you start—it makes a big difference!
Thin Layers: Use thin layers of polish to avoid clumps, especially with bright reds and pinks.
Top Coat Magic: Always add a top coat to keep your designs fresh for longer.
Practice First: New to nail art? Try drawing on paper first to get the hang of it!
Let’s Wrap It Up!
These strawberry nail art ideas are so much fun to try! They’re easy, adorable, and perfect for beginners. From 3D strawberries to chocolate drips, there’s a look here for every summer vibe. Plus, they’ll make your nails the star of your Instagram feed!
Grab your polish and give them a go—you’ve got this! I’d love to see your creations, so share them with us at @thenailsnation. Let’s keep the nail inspo going!