Hello, nail lovers! Are you on the hunt for a nail color that’s equal parts serene and stylish? Look no further than Periwinkle Nail Designs! With its delicate blend of blue and purple undertones, periwinkle nails have a sense of calm sophistication that’s perfect for any occasion.
So, let’s explore a collection of stunning periwinkle nail designs that are sure to inspire your next manicure adventure!

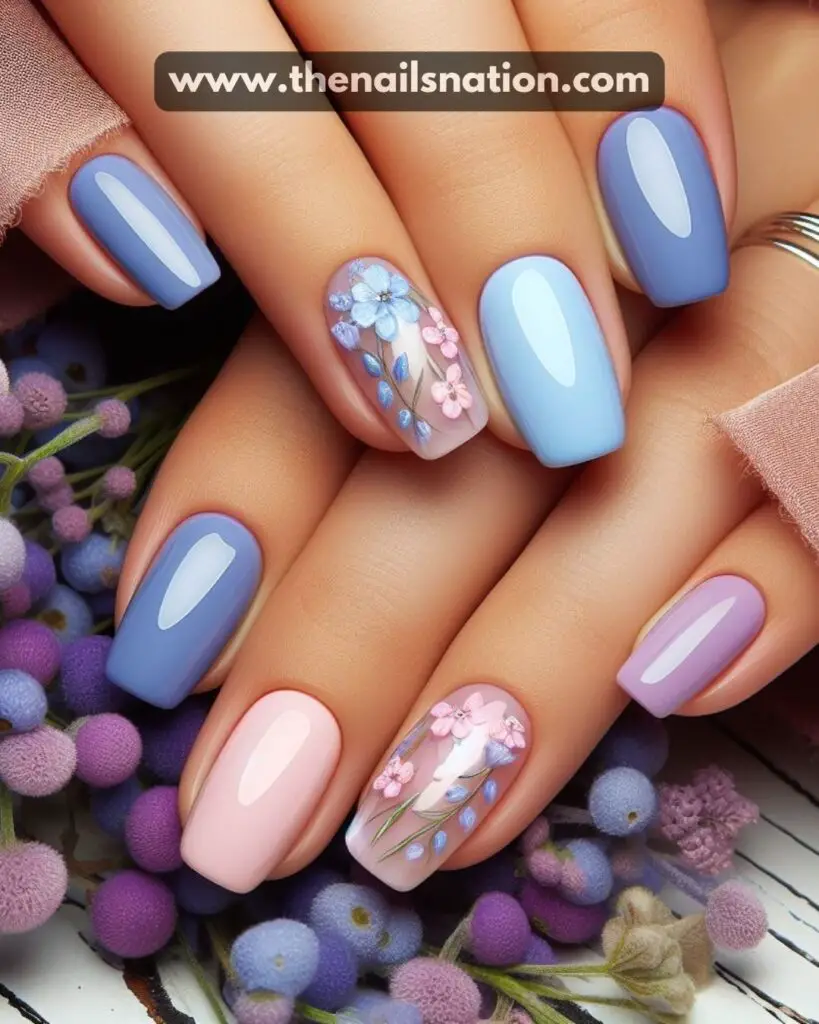
Periwinkle Nails
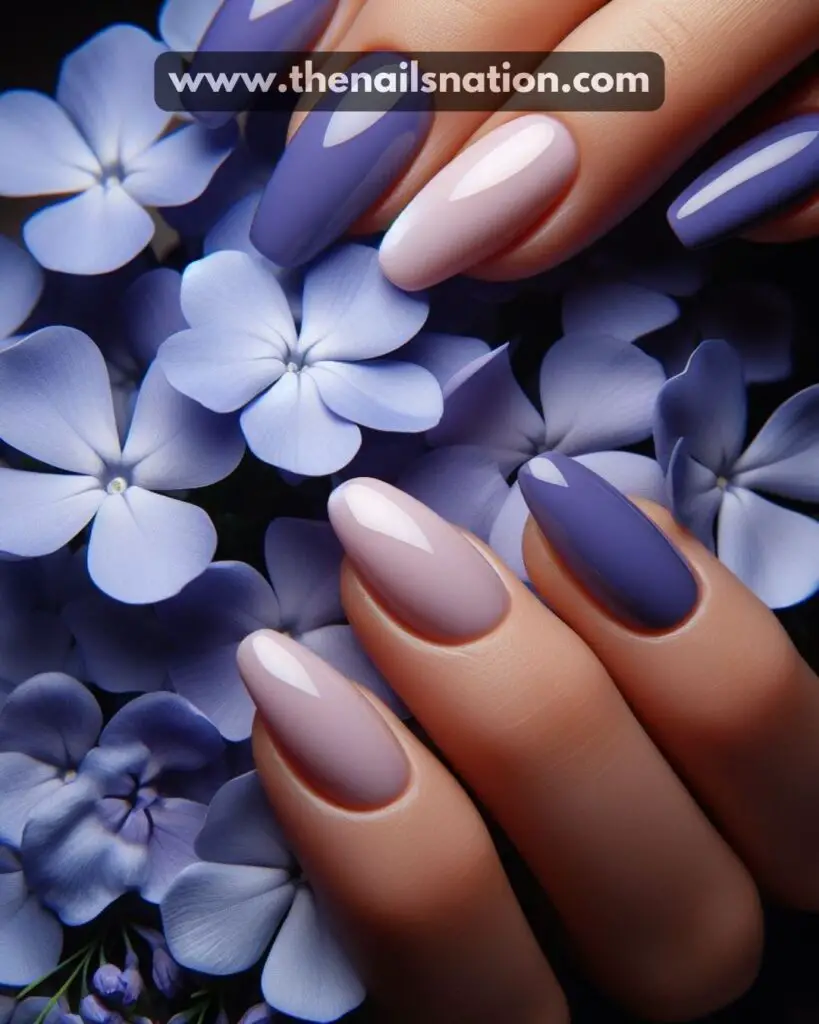
Periwinkle nails are a charming and elegant choice for any manicure. The color periwinkle falls somewhere between blue and purple.
Periwinkle nails can be styled in a variety of ways to suit any occasion or personal preference. From simple and understated looks to bold and eye-catching nail art, there’s no shortage of creativity when it comes to periwinkle manicures.
One of the best things about Periwinkle Nail Designs is their versatility. This soft and subtle shade pairs well with a wide range of colors.
1. Classic Periwinkle Nail Design
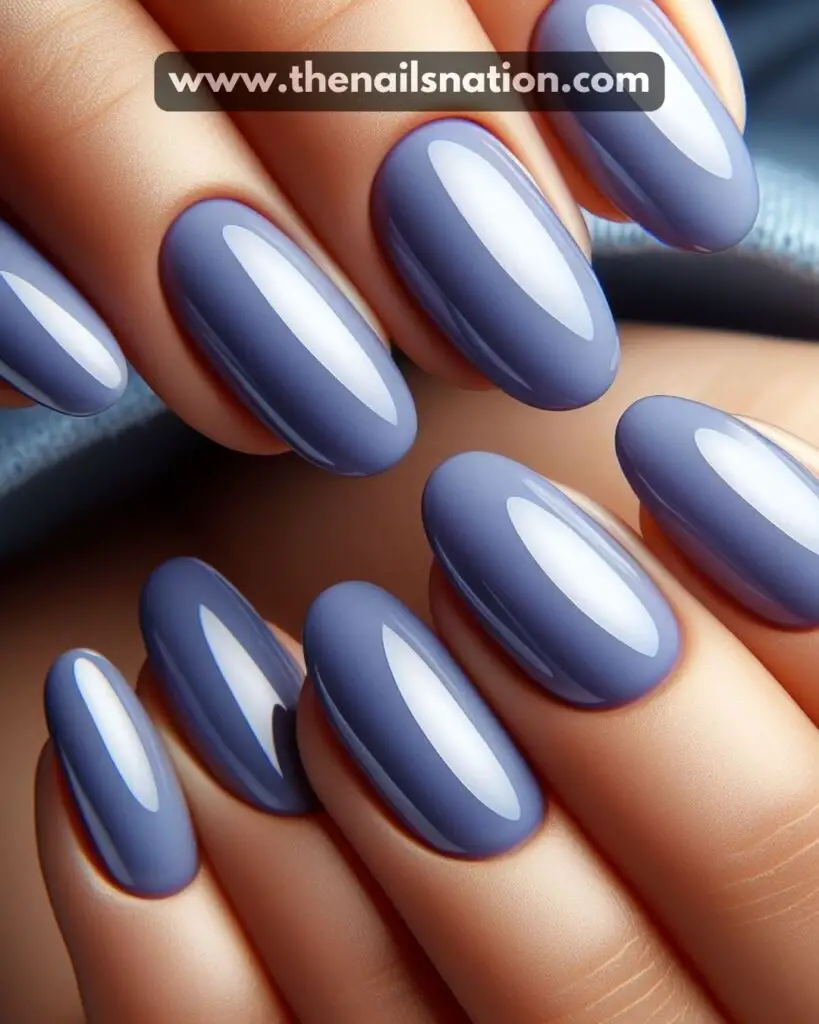
Let’s start with a timeless classic – the solid Periwinkle Nail Designs. This simple yet elegant look is perfect for any occasion, from everyday wear to special events.
To achieve this manicure, simply apply two coats of your favorite periwinkle nail polish and finish with a glossy top coat for added shine and durability. This chic and understated design will never go out of style!
2. Periwinkle French Tips
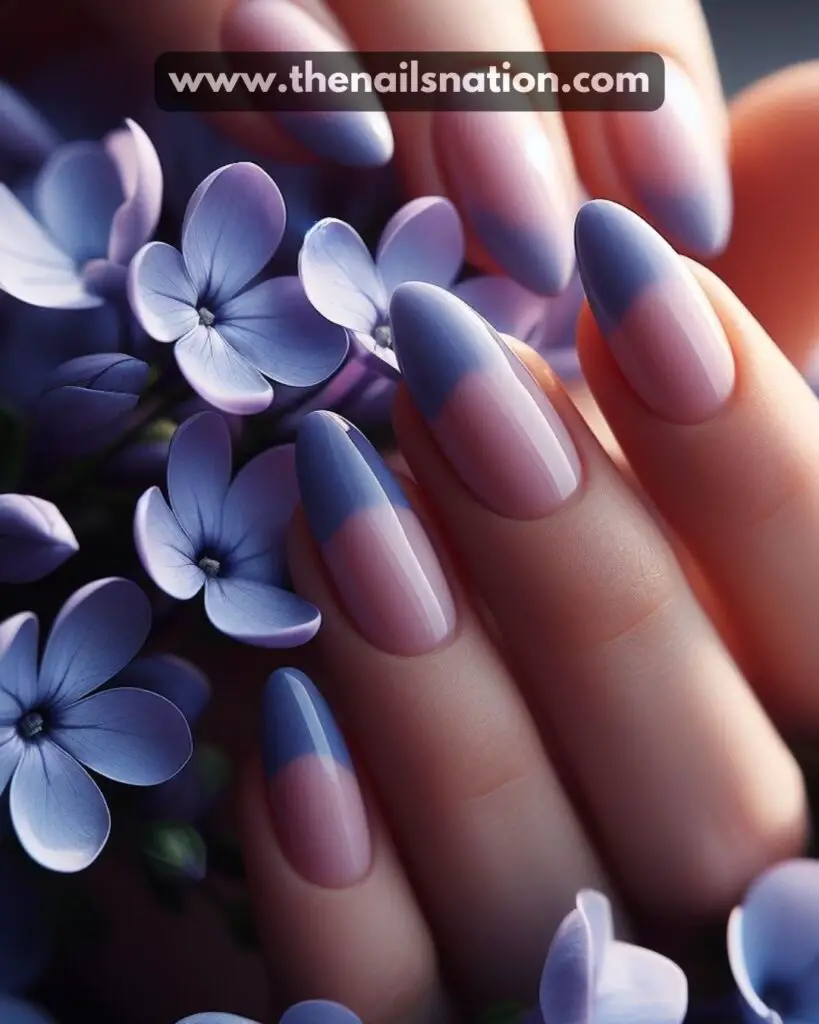
Put a modern twist on the traditional French manicure with periwinkle French tips. Instead of the usual white tips, opt for periwinkle for a fresh and stylish take on this classic look.
You can choose to keep the rest of your nails nude or add a touch of sparkle with glitter accents. Either way, periwinkle French tips are sure to turn heads and make a statement!
3. Floral Periwinkle Nail Art
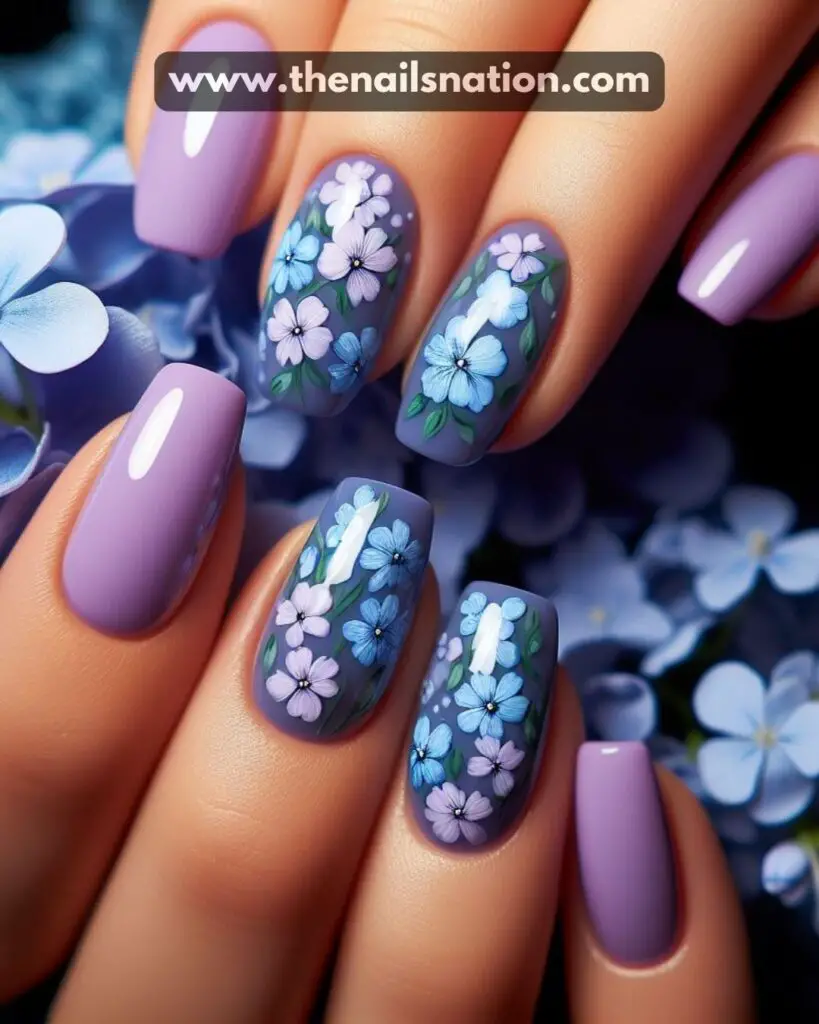
Bring a touch of nature to your nails with floral periwinkle nail art. Start by painting your nails with a periwinkle base color, then use a thin nail brush or dotting tool to create delicate flowers in shades of white, pink, and green.
Finish with a clear top coat to seal in your design and add a glossy finish. This whimsical and feminine nail art is perfect for springtime or any time you want to channel your inner flower child!
You may also like Pink and Yellow Nails.
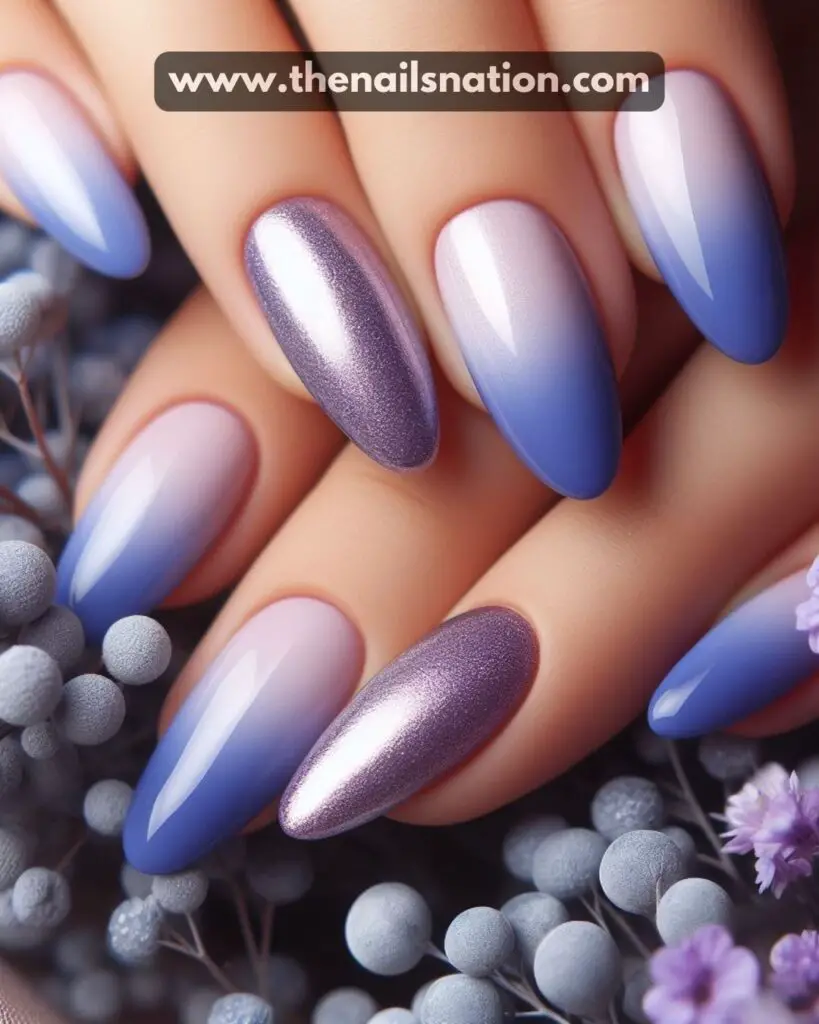
4. Periwinkle Ombre Nails
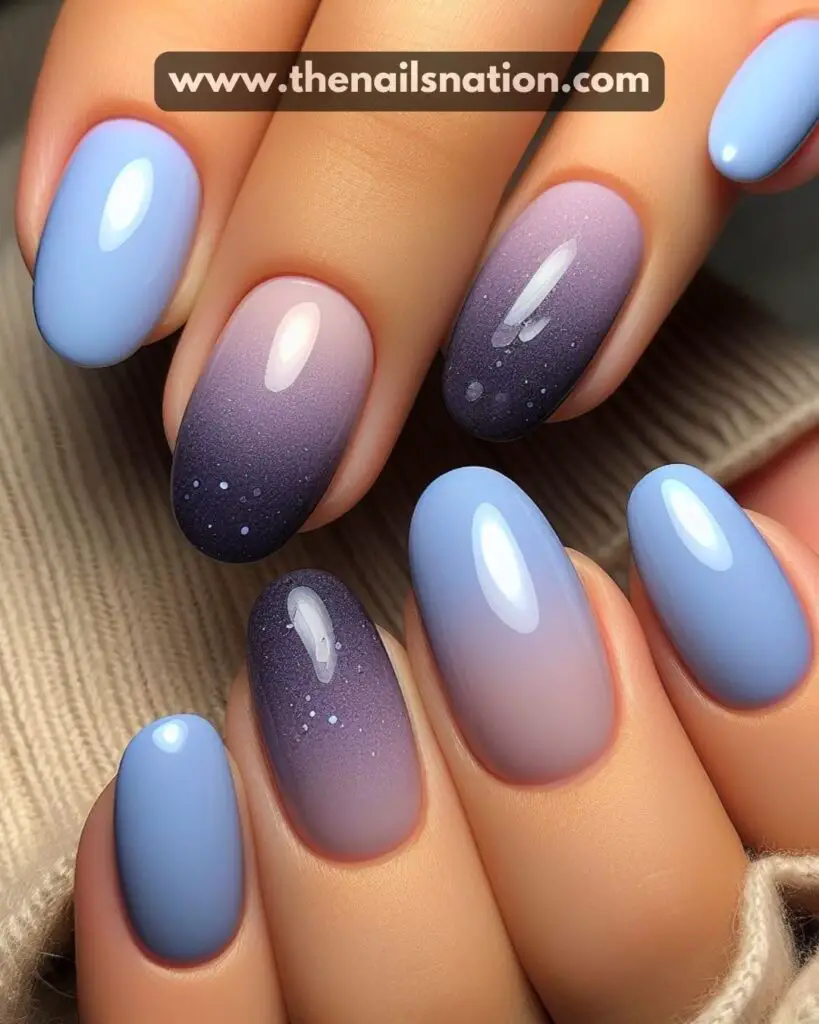
Ombre nails are always on-trend, and periwinkle is the perfect color choice for this gradient look. Start by painting your nails with a light periwinkle base color, then use a makeup sponge to dab on darker periwinkle polish towards the tips of your nails.
Blend the colors together seamlessly for a smooth transition from light to dark. Finish with a matte top coat for a modern and sophisticated finish.
5. Periwinkle Marble Nails

Marble nails are a hot trend in the nail world, and periwinkle marble nails are no exception. To create this mesmerizing look, start by painting your nails with a light periwinkle base color.
Then, use a thin nail brush or toothpick to create swirls and veins of darker periwinkle polish. Finish with a clear top coat to seal in your design and add shine. The result? A chic and sophisticated manicure that’s sure to impress!
If you don’t know how to do marble nails we have a tutorial on this. You can check it out here – How to do Marble Nails.
6. Periwinkle and Gold Accents Nails
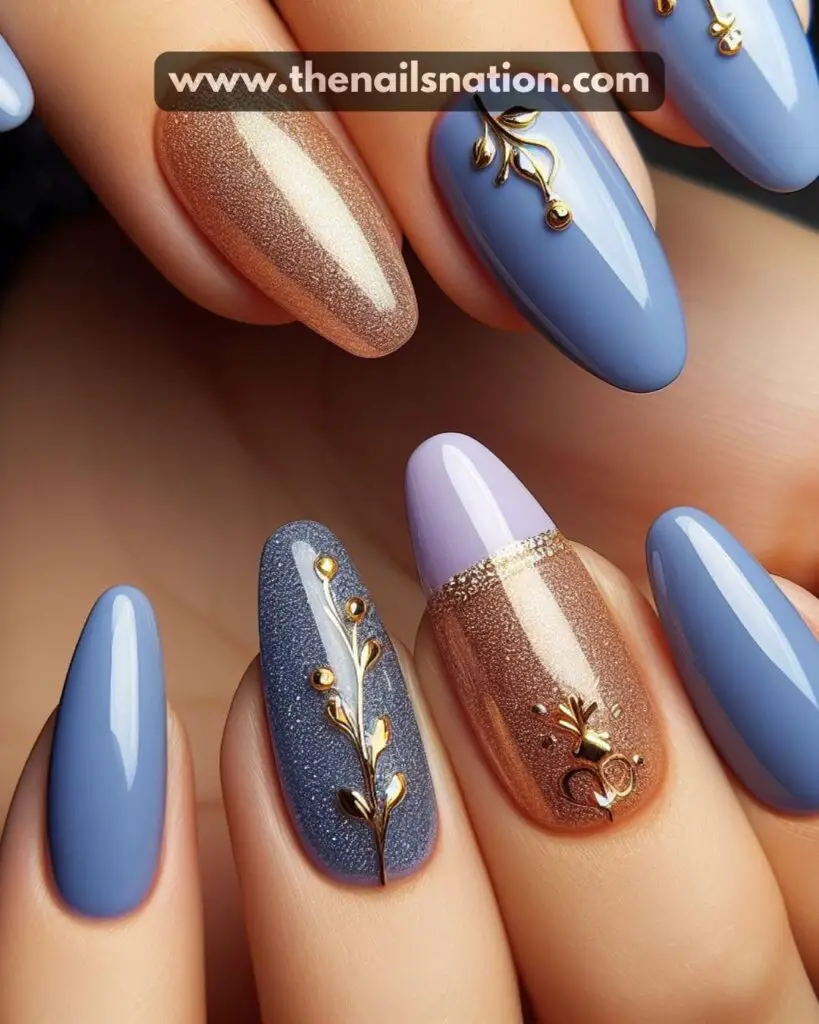
Add a touch of luxury to your Periwinkle Nail Designs with gold accents. You can try it with gold foil, glitter, or metallic polish, gold complements periwinkle beautifully and adds a touch of glamour to any manicure.
Try adding gold accents to your periwinkle nails as an accent nail, on the tips, or in geometric designs for a modern and stylish look.
7. Periwinkle Negative Space Nails
Negative space nail art is all the rage, and periwinkle negative space nails are a chic and modern take on this trend. Start by painting your nails with a clear base coat, then use striping tape or nail vinyls to create geometric shapes or lines on your nails.
Leave some areas unpainted to reveal the natural nail underneath, creating a cool negative space effect. Finish with a glossy top coat for a polished finish.
We have a dedicated blog post on Trendy Summer Nails Ideas as well.
8. Periwinkle and Silver Gradient
For a sophisticated and elegant look, try a periwinkle and silver gradient. Start by painting your nails with a light periwinkle base color, then use a makeup sponge to dab on silver polish towards the tips of your nails.
Blend the colors together seamlessly for a smooth gradient effect. Finish with a glossy top coat to seal in your design and add shine. This chic and stylish manicure is perfect for any special occasion. Peach Ombre Nails are also a great option.
9. Periwinkle Holographic Nails
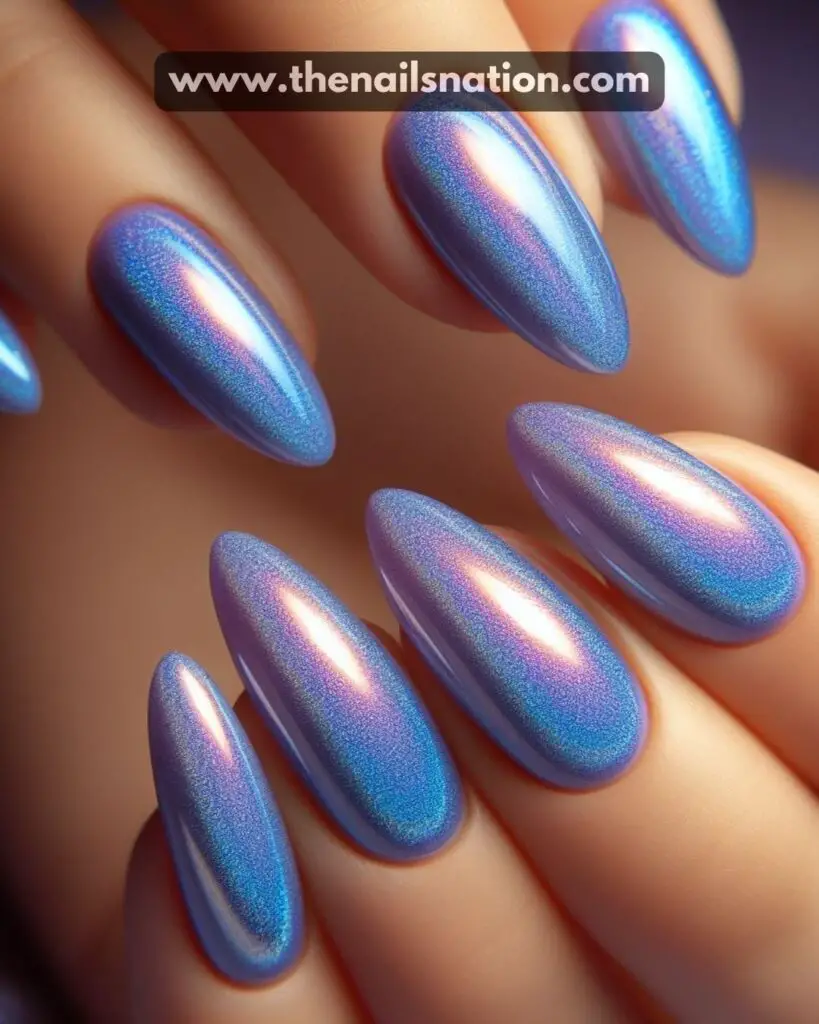
Holographic nail polish adds a mesmerizing and futuristic touch to any manicure, and periwinkle holographic nails are no exception.
Start by painting your nails with a periwinkle base color, then layer on a holographic top coat for a dazzling finish. In the sunlight, your nails will sparkle and shine with a rainbow of colors, making them truly stand out from the crowd.
10. Periwinkle and Pastel Accents Nails
Add a pop of color to your periwinkle nails with pastel accents. Whether it’s soft pink, baby blue, or mint green, pastel shades complement periwinkle beautifully and add a fun and playful touch to your manicure.
Try adding pastel accents in the form of stripes, dots, or geometric shapes for a trendy and eye-catching look. You can also try Yellow Ombre Nails Ideas for this summer.
If you love fresh floral nail art, here are some Spring Nail Ideas for you.
Tips for Periwinkle Nails
Choose the Right Shade: Periwinkle comes in various tones, from lighter pastels to deeper hues. Experiment with different shades to find the one that complements your skin tone and personal style.
Prep Your Nails: Before applying polish, make sure your nails are clean, dry, and free of any old polish. Use a nail buffer to smooth the surface and ensure a flawless application.
Use a Base Coat: Applying a base coat not only helps the polish adhere better to your nails but also prevents staining. Opt for a clear base coat to maintain the true color of your periwinkle polish.
Apply Thin Layers: When applying periwinkle nail polish, remember that thin layers are key. Apply a thin coat of polish to each nail, allowing it to dry completely before adding additional layers.
Use Even Strokes: To achieve a smooth and even finish, use steady and even strokes when applying polish. Start from the base of the nail and brush upwards towards the tip for best results.
Seal with a Top Coat: Once your periwinkle polish is dry, seal it with a top coat to add shine and prolong the wear of your manicure. A clear top coat will also help protect your nails from chipping and peeling.
Add Some Flair: Get creative with your periwinkle nails by adding fun accents like glitter, nail stickers, or nail art. Mix and match different designs to create a unique and eye-catching look.
Maintain Your Manicure: To keep your periwinkle nails looking their best, be sure to moisturize your cuticles regularly and touch up any chips or scratches as needed. With proper care, your periwinkle manicure will stay fresh and vibrant for days to come!
Conclusion
We’d love to hear from you! Which periwinkle nail design are you most excited to try? Have you experimented with periwinkle polish before, or is this your first time diving into this lovely hue? Share your thoughts, experiences, and any tips or tricks you have for achieving the perfect periwinkle manicure in the comments below.
Oh, and yes! We have recently posted about summer toe nails ideas too, don’t forget to check it out.
Let’s inspire each other to create stunning nail art and elevate our beauty game together! Don’t forget to tag us in your nail photos on social media so we can see your fabulous creations. Happy painting! 🌸💅