
Looking for the cutest daisy nail art ideas 🌼? Okay but why are these nails literally everywhere right now… and somehow still not overdone?
It’s that perfect mix — soft, playful, a little nostalgic, but still feeling fresh every single time. Like you can get daisy nails 10 different ways and it never feels like “oh I’ve already done that.”
And honestly? These are the kind of nails that make people notice. Not in a loud way – in that “wait, your nails are so cute” way.
So if your camera roll is already full of nail screenshots (same), here are daisy nail ideas you’ll actually want to try, with real breakdowns so you can recreate them or explain exactly what you want 💅✨
Simple Daisy Nails
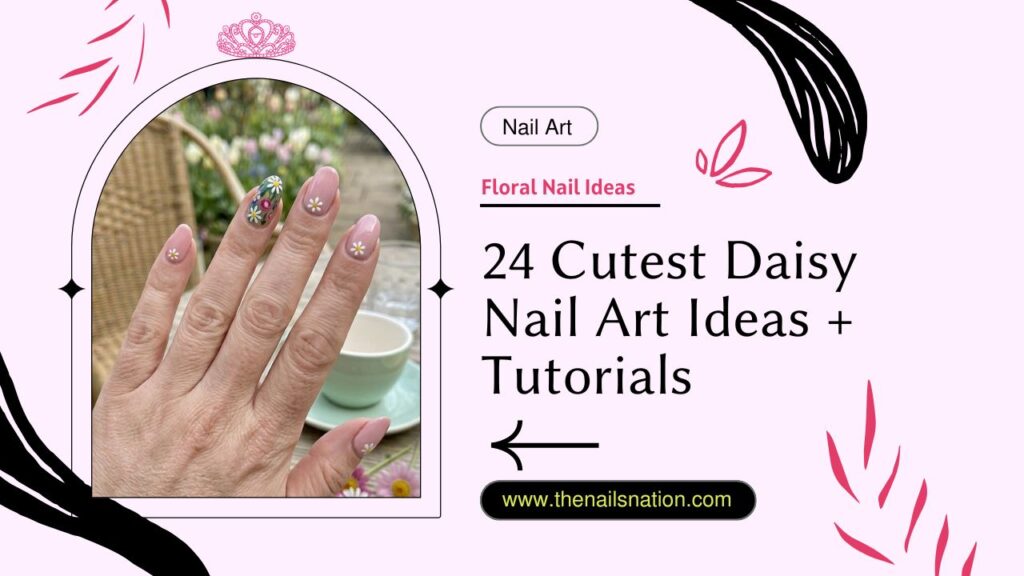
There’s something about simple daisy nails that just always works – like no matter how many trends come and go, this one stays cute. It’s clean, soft, and gives that “effortless but still put together” vibe that everyone’s trying to achieve right now.
This is the kind of manicure you get when you don’t want anything too loud, but you still want your nails to feel intentional. The daisies don’t overpower the look – they sit there quietly making everything prettier.
And the best part? It goes with everything. Casual outfits, dressy looks, even messy hair days – these nails still look good.
Tutorial:
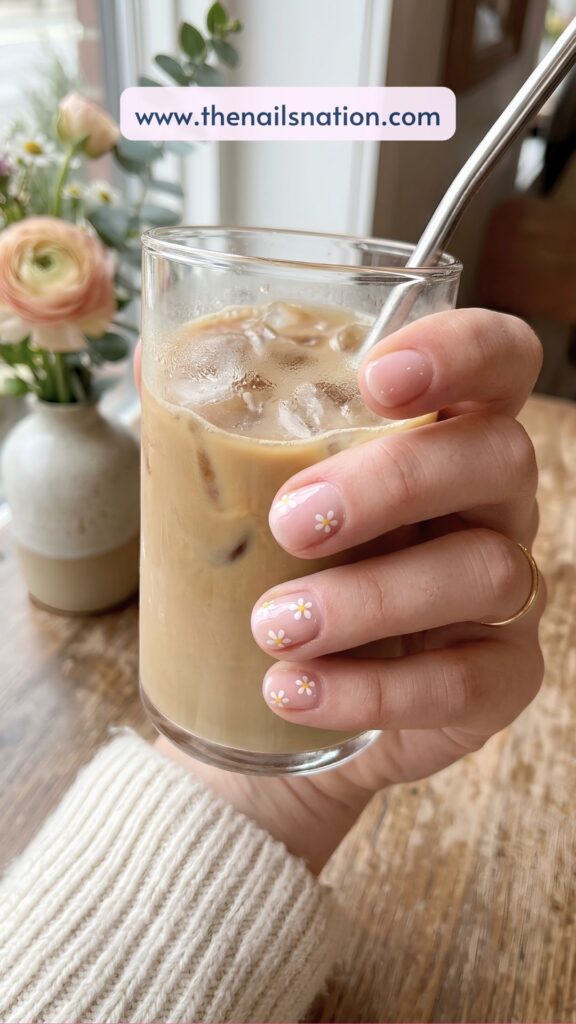
- Start with a soft base – sheer pink, milky white, or a glossy, clear layer.
- Use a dotting tool (or even a toothpick) to create 5 tiny white dots in a circle.
- Add a small yellow dot in the centre to complete the flower.
- Repeat on a few nails, not all – spacing makes it feel more natural.
- Finish with a glossy top coat for that fresh, clean shine.
🌼 Pro tip: Slightly uneven daisies actually look better – it keeps the vibe soft and not overly “perfect”.
Pastel Daisy Nails
Okay, pastel daisy nails are basically spring in nail form – soft colours, delicate florals, and that dreamy aesthetic that looks like it belongs on a Pinterest mood board.
These nails feel light, fresh, and romantic without trying too hard. Like you didn’t overthink it, but somehow they still look amazing in every photo.
The mix of pastel tones with daisies creates a layered look – not complicated, just visually interesting enough to keep people staring a little longer than usual.
Tutorial:
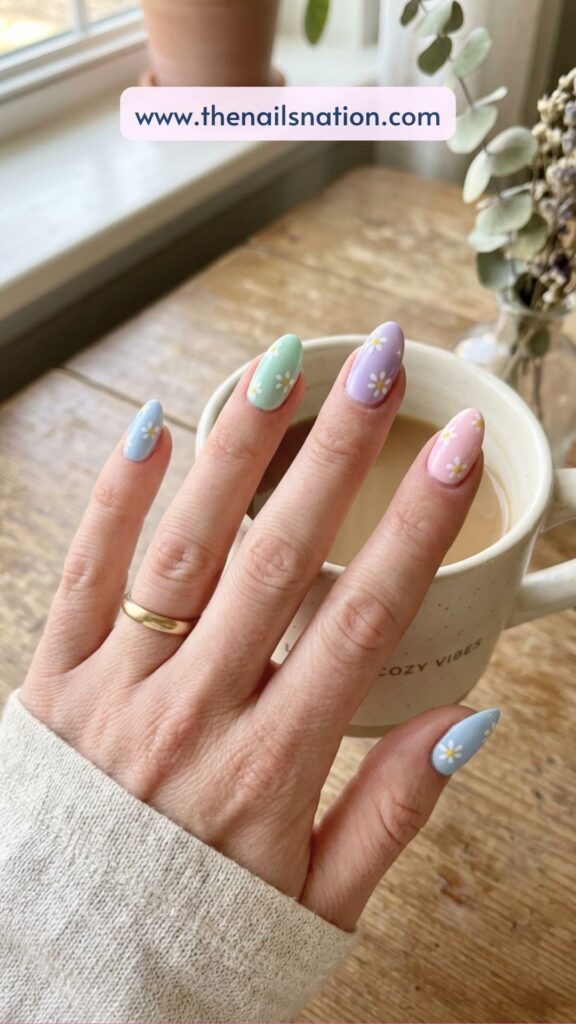
- Paint each nail a different pastel shade (baby pink, lavender, mint, sky blue).
- Choose 1–2 nails to add daisy designs.
- Keep the daisies small and delicate so they don’t overpower the colour.
- Use white petals + soft yellow centres for contrast.
- Seal everything with a glossy or slightly jelly top coat.
🌼 Try mixing matte pastels with glossy flowers for a subtle texture difference.
Pink Daisy Nails
Pink daisy nails are that girl. Like if you’re ever confused about what to get – this is the safe option that still feels exciting.
They lean into that cute, feminine vibe but don’t feel childish. It’s more like soft, polished, and a little flirty – the kind of nails that look good holding literally anything (coffee, phone, your friend’s hand while you’re showing them something).
Also, pink + white daisies are just a combination that never misses.
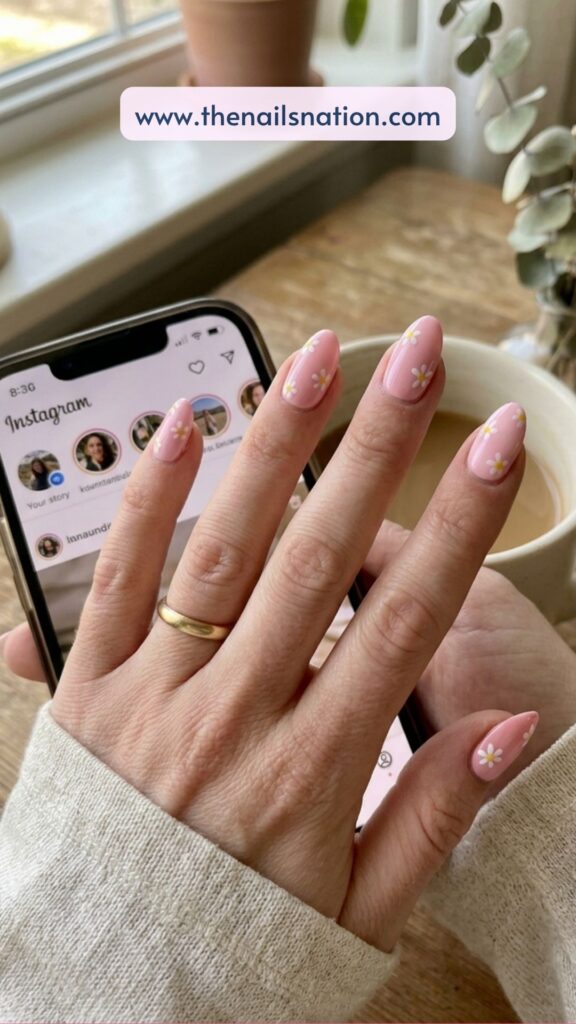
Tutorial:
- Apply a soft pink or bright pink base depending on your mood.
- Add white daisy petals using a dotting tool.
- Place a yellow or gold dot in the centre.
- Add flowers to 2–3 nails or scatter across all nails lightly.
- Finish with a high-gloss top coat.
🌼 For extra detail, add micro dots around the daisies for a slightly playful vibe.
Blue Daisy Nails
There’s something about blue daisy nails that feels calm but still really eye-catching – like they’re not trying to be the centre of attention, but they still kind of are.
They give that airy, fresh feeling – almost like your nails match the sky on a clear day. It’s subtle, but in a very aesthetic way.
This is also a great option if you want something different from the usual pink florals but still want to stay in that soft, wearable zone.
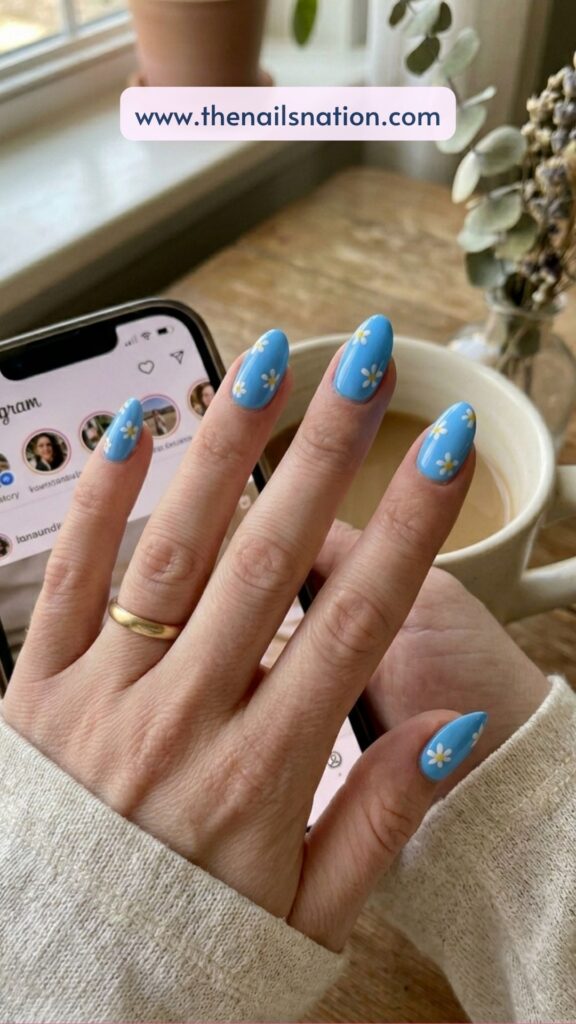
Tutorial:
- Paint nails with a soft blue or pastel blue shade.
- Add white daisies on top using a dotting tool.
- Keep placement slightly off-centre for a modern look.
- Don’t overcrowd – let the colour breathe.
- Seal with a glossy top coat.
🌼 Pair with silver jewellery – it elevates the whole vibe instantly.
French Tip Daisy Nails
French tip daisy nails are what happens when classic meets cute – and honestly, it’s such a good combination.
You get that clean, structured look from the French tip, and then the daisies soften it just enough so it doesn’t feel too serious.
This style feels polished but still playful, which is why it works for literally any occasion.
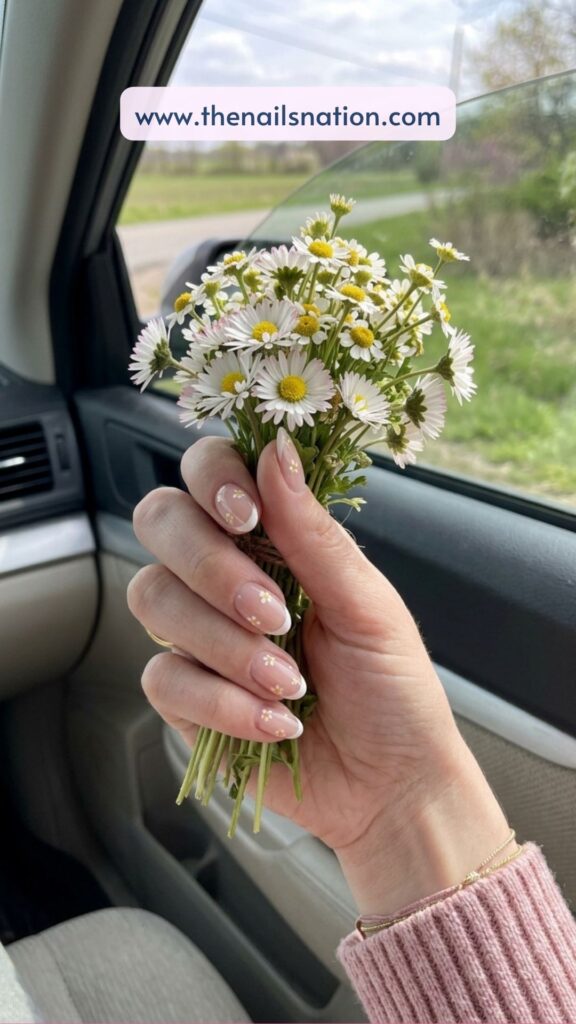
How to recreate:
- Create a thin French tip using white or pastel polish.
- Add tiny daisy details along the tip line or on one accent nail.
- Keep the flowers small so they don’t compete with the tip.
- Use a fine tool for better precision.
- Finish with a glossy top coat.
🌼 Micro French tips (super thin) look extra trendy right now.
Minimal Daisy Nails
Minimal daisy nails are for when you want something subtle but still meaningful – like you don’t need a full design on every nail to make it look good.
There’s a quiet confidence in this style. It’s clean, simple, and feels very intentional.
These nails don’t scream for attention, but people notice them anyway – and that’s kind of the point.
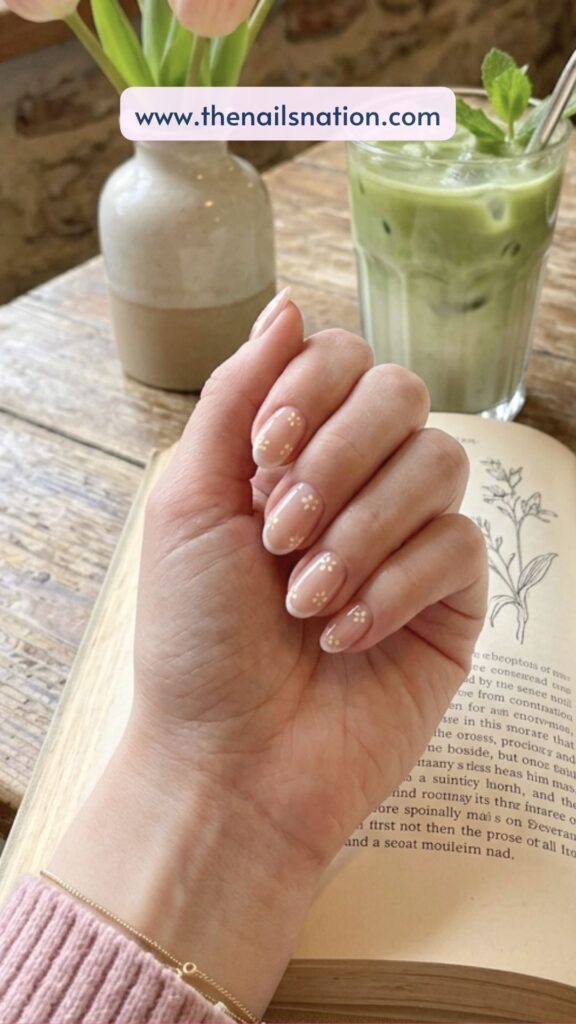
Tutorial:
- Use a sheer or glossy base colour.
- Add one tiny daisy per nail (or even just one nail total).
- Keep the design super small and precise.
- Avoid adding extra elements – let it stay simple.
- Seal with a top coat.
🌼 Negative space makes this look even more elevated.
Short Daisy Nails
Short nails seriously deserve more love because when they’re done right, they look SO chic – and short daisy nails are proof of that. There’s something about tiny floral details on shorter nails that feels extra clean and put together.
This style gives effortless energy. Like you’re not doing the absolute most, but your nails still somehow look adorable every time you hold your phone or grab your coffee.
And honestly? Daisies actually look better on shorter nails sometimes because the design feels tiny, delicate, and balanced instead of overly dramatic.
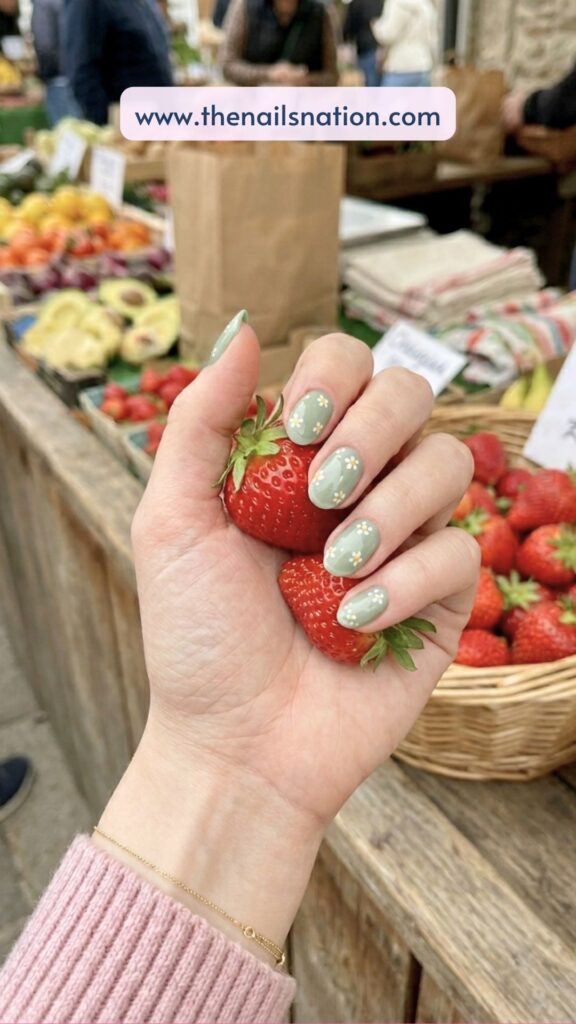
Tutorial:
- Shape your nails into a soft square or rounded shape.
- Apply a light base color like pastel pink, white, or soft peach.
- Use a dotting tool to add tiny daisies near the corners or tips.
- Keep the flowers small so the nails don’t feel crowded.
- Finish with a glossy top coat to make everything look fresh.
🌼 Tiny florals + short nails = peak clean girl manicure.
Gel Daisy Nails
If you love a manicure that stays glossy and pretty for weeks, gel daisy nails are absolutely the move. Everything about gel polish just makes floral nail art look smoother, shinier, and more polished.
The daisies pop more, the colors look richer, and the overall manicure feels salon-level even if you did it yourself at home.
These are the kind of nails that still look cute 10 days later when your life is chaotic and you’ve forgotten your top coat even exists.
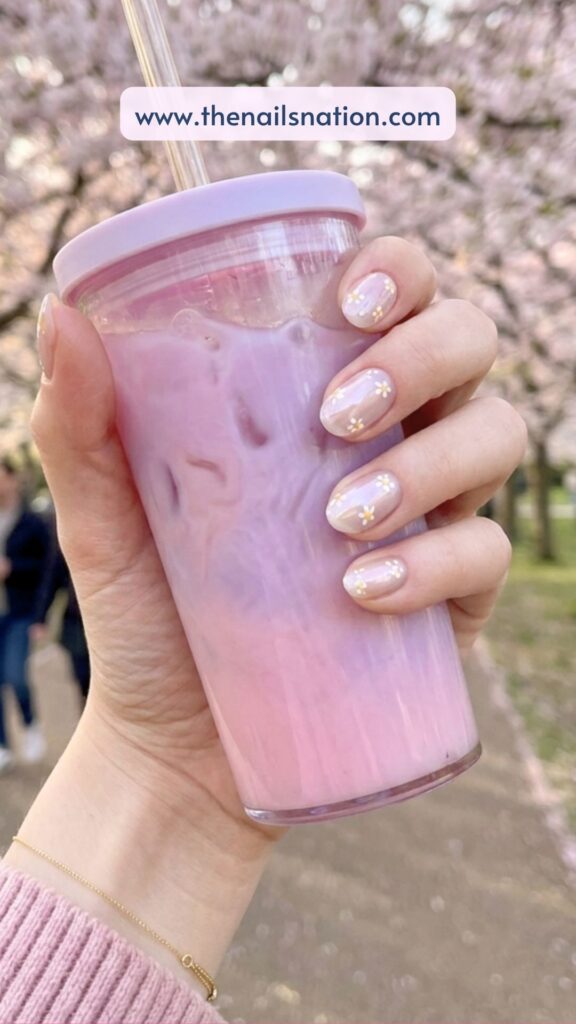
Tutorial:
- Prep nails properly by buffing and applying gel base coat.
- Cure the base layer under a UV lamp.
- Apply your chosen color and cure again.
- Create daisy art using gel polish and a fine tool.
- Seal with a glossy gel top coat and cure one last time.
🌼 Thin gel layers always look cleaner and last longer.
Yellow Daisy Nails
Okay but yellow daisy nails literally look happy. Like there’s no other way to explain it.
They’re bright, cheerful, playful, and instantly give your nails that sunny spring/summer energy that makes everything feel cuter. This style definitely stands out more than softer floral looks, but in the best way possible.
And paired with white daisies? Obsessed.
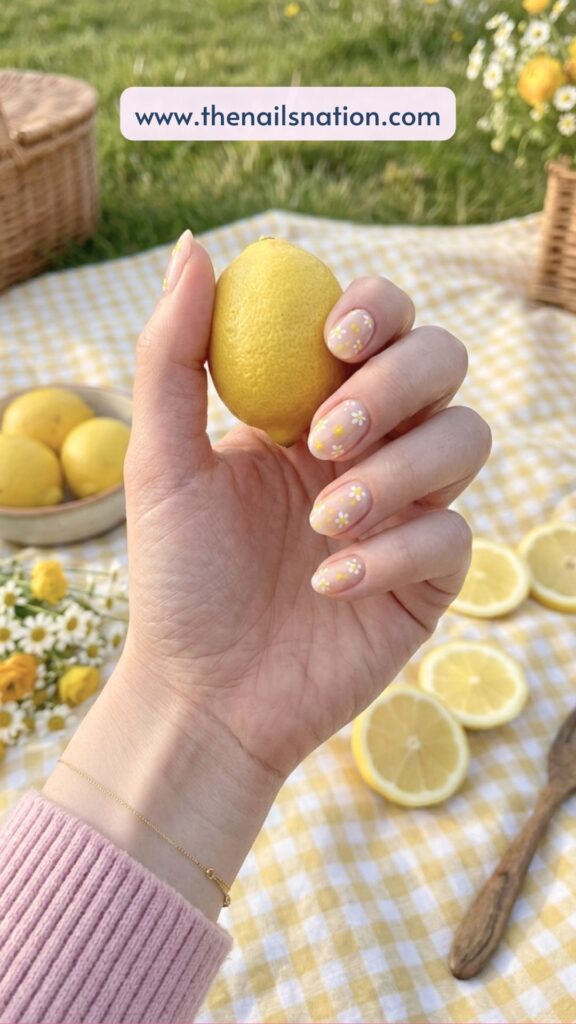
Tutorial:
- Apply a buttery yellow or bright sunflower yellow base.
- Add white daisy petals using a dotting tool.
- Place slightly larger flowers on accent nails for balance.
- Add tiny yellow centres with a brighter tone for dimension.
- Finish with a glossy top coat.
🌼 A tiny smiley face accent nail would look SO cute with this.
Also, check – 21 Trendy Butter Yellow Nails for a Soft Vibe
Glossy Daisy Nails
There’s something so satisfying about glossy daisy nails. Like that super shiny, reflective finish just makes everything look cleaner, fresher, and more expensive.
The glossy top coat almost gives the flowers a “floating” effect, especially when paired with soft pastel bases. It’s simple, but visually it makes a huge difference.
And honestly? Glossy nails always photograph better. The shine catches the light in the prettiest way.
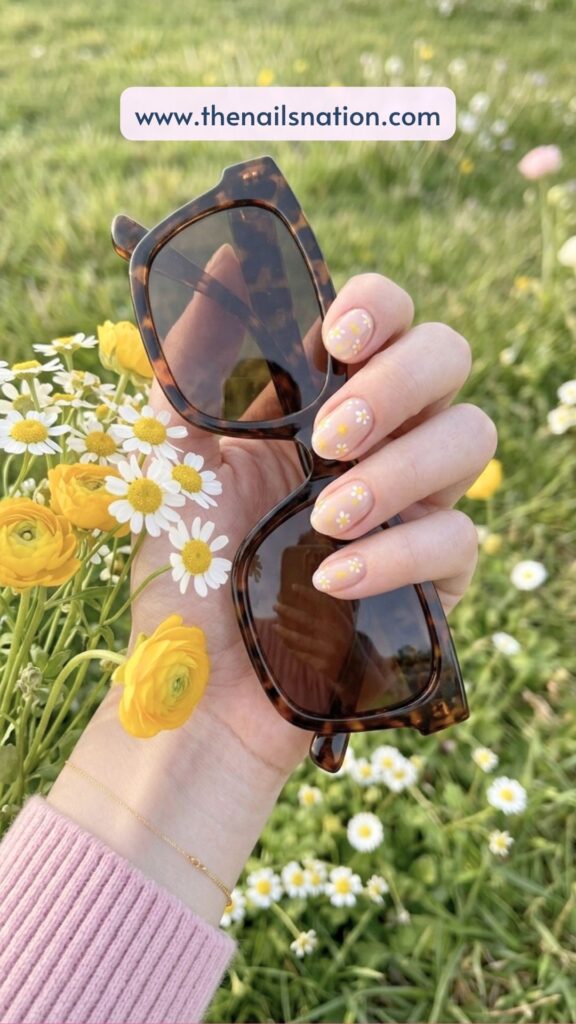
Tutorial:
- Start with a smooth base colour in any soft or pastel shade.
- Add daisy art using white petals and yellow centres.
- Let the design dry completely before the top coat.
- Apply a thick, ultra-glossy top coat evenly across the nail.
- Cure or dry fully to lock in that glassy shine.
🌼 Reapplying top coat every few days keeps the manicure looking brand new.
Matte Daisy Nails
Matte daisy nails feel softer, moodier, and a little more fashion-girl coded. The velvety finish completely changes the vibe of floral nails in such a cool way.
Instead of looking bright and glossy, the flowers feel muted and artistic – almost like painted designs instead of nail art.
It’s subtle but still very intentional.
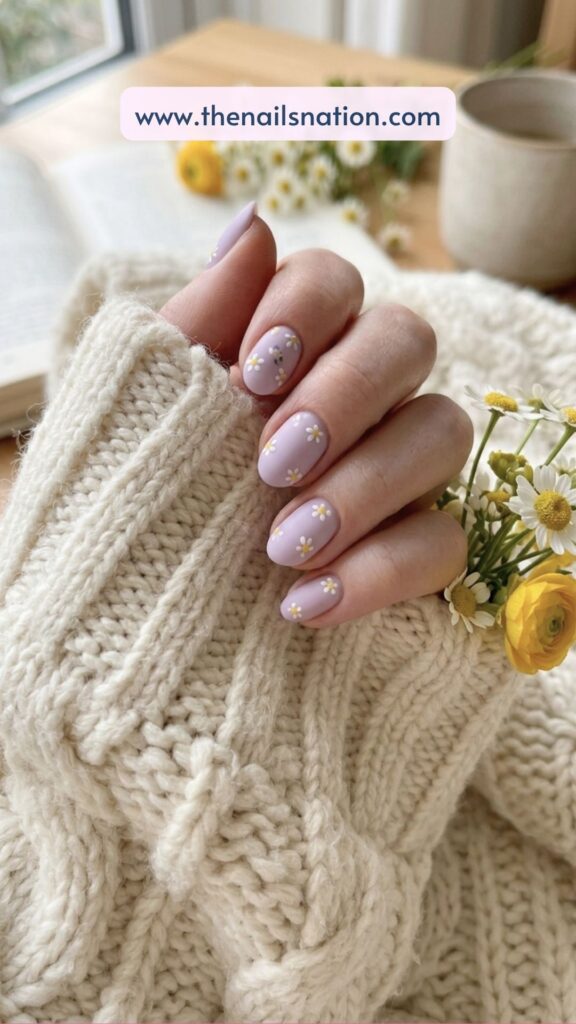
Tutorial:
- Apply your base color normally.
- Create daisy art using white or pastel polish.
- Allow everything to dry completely.
- Apply a matte top coat over the entire nail.
- Let it fully set before touching anything.
🌼 Matte pastel nails with tiny daisies look SO aesthetic.
3D Daisy Nails
If regular floral nails are cute, 3D daisy nails are next-level cute. These are the nails that people actually stop to look at because the flowers physically pop off the nail.
It’s playful, dramatic, and very Pinterest-core in the best possible way.
The texture makes the manicure feel expensive and creative without needing a ton of extra design.
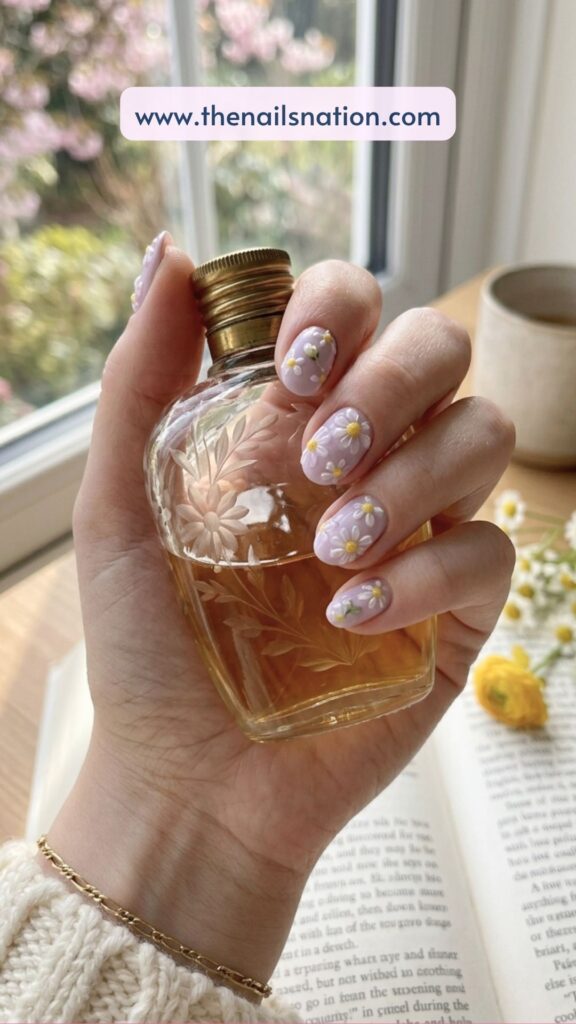
Tutorial:
- Apply base colour and cure/dry completely.
- Use builder gel or acrylic to sculpt raised petals one by one.
- Cure each flower layer separately if using gel.
- Add a tiny gem or a yellow centre detail.
- Seal carefully around the design without flattening it.
🌼 Keep the 3D flowers on just 1–2 nails so the look stays balanced.
Acrylic Daisy Nails
Long acrylic nails + daisies = main character manicure energy 💅✨
These nails give you way more space to play with designs, which means you can go more detailed, more creative, and honestly just more extra.
The flowers look especially pretty on almond or coffin acrylics because the elongated shape makes the design feel elegant instead of crowded.
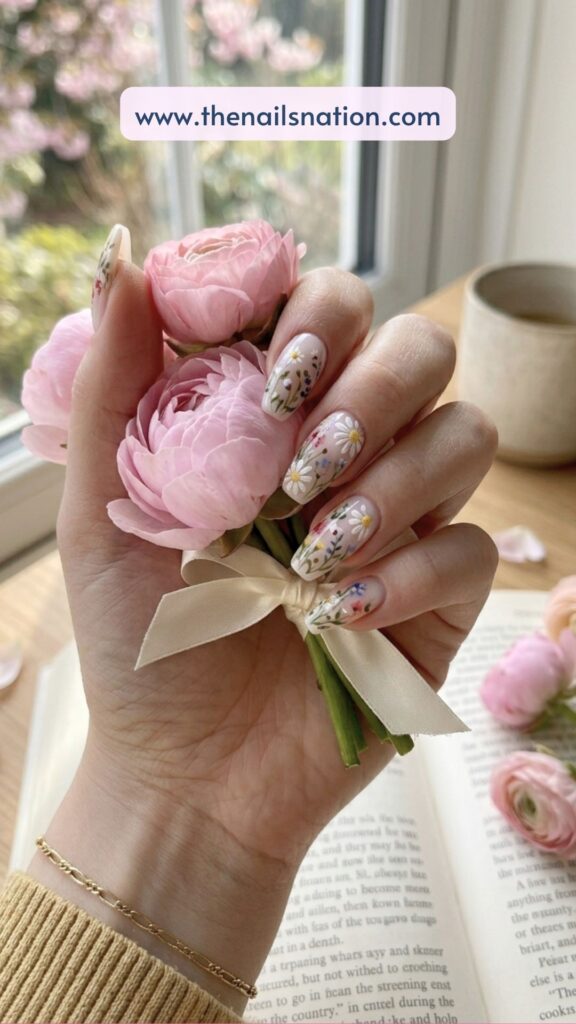
Tutorial:
- Apply acrylic extensions and shape them evenly.
- Choose your base colour and apply 1–2 coats.
- Sketch daisy shapes lightly before painting details.
- Add petals using a thin nail art brush.
- Finish with a glossy top coat for maximum shine.
🌼 Adding tiny rhinestones in the flower centres makes the design look even more luxe.
Tiny Daisy Nail Art
Tiny florals just have a different kind of charm. Tiny daisy nail art feels delicate, detailed, and effortlessly pretty without trying too hard.
This style works especially well if you love minimal nails but still want something feminine and playful.
And because the flowers are so small, the manicure never feels overwhelming.
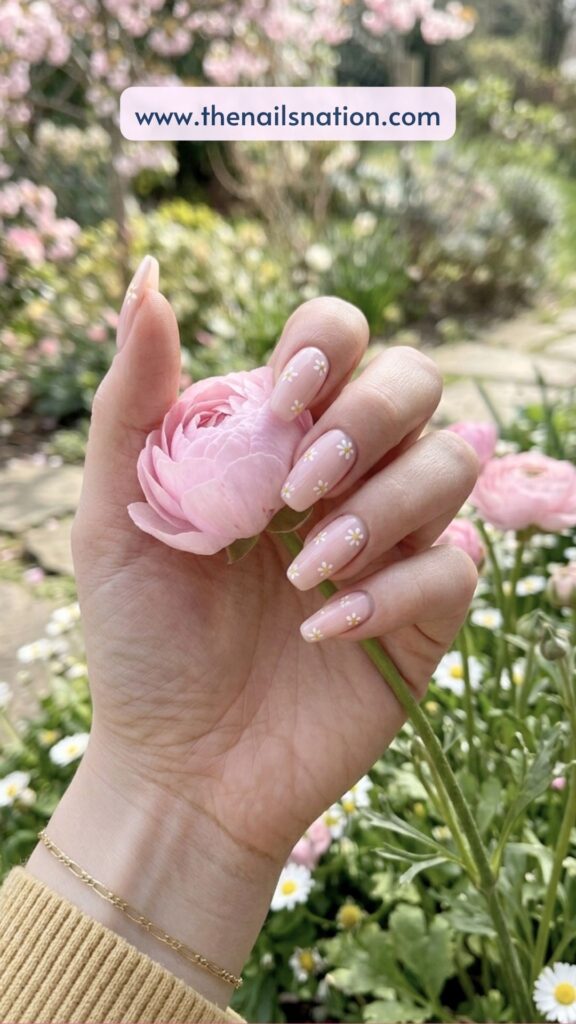
Tutorial:
- Use a sheer or soft-colored base.
- Create tiny petal dots using a fine dotting tool.
- Add mini yellow centres carefully.
- Scatter flowers randomly across nails for a natural feel.
- Seal with a glossy top coat.
🌼 Tiny daisies layered near the cuticle area look super trendy right now.
White Daisy Nails
There’s something so clean and dreamy about white daisy nails. They feel soft, fresh, and kind of angelic without looking boring.
Using white as the main colour keeps the manicure looking elevated and polished, while the daisy details stop it from feeling too plain.
It’s simple, but it photographs SO beautifully.
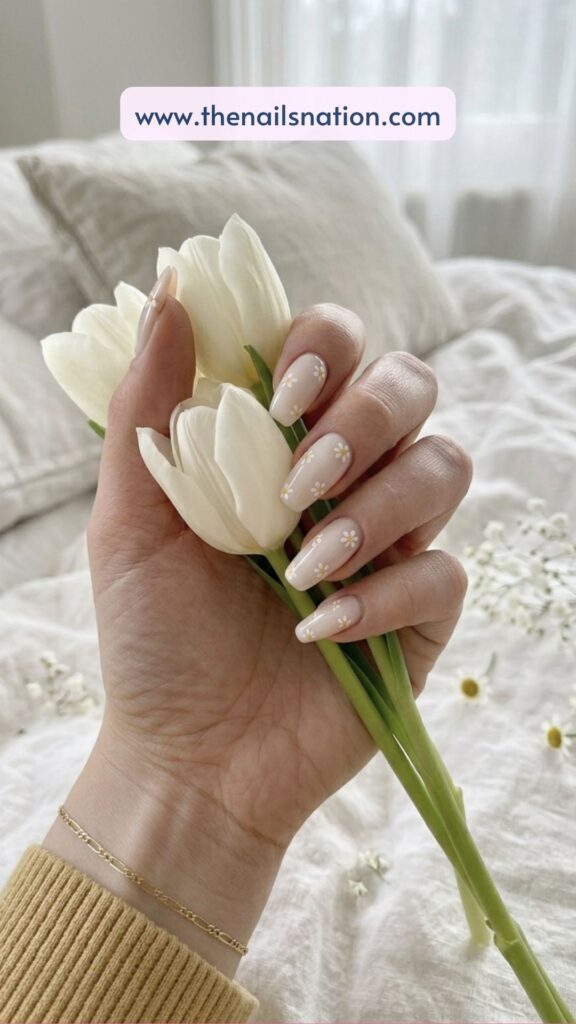
Tutorial :
- Apply a soft white or milky white base colour.
- Add daisies using slightly different tones for depth.
- Keep the flower placement minimal and balanced.
- Add tiny yellow or gold centres.
- Finish with a glossy top coat.
🌼 Tiny pearl accents pair perfectly with this style.
Love tulips? Then check – Tulip nail ideas.
Purple Daisy Nails
Purple daisy nails feel soft, dreamy, and slightly magical – like something straight out of a Pinterest mood board.
Lilac tones especially make the white petals pop beautifully, while deeper purples create a moodier floral vibe that still feels super feminine.
This is one of those colour combos that looks expensive without needing a complicated design.
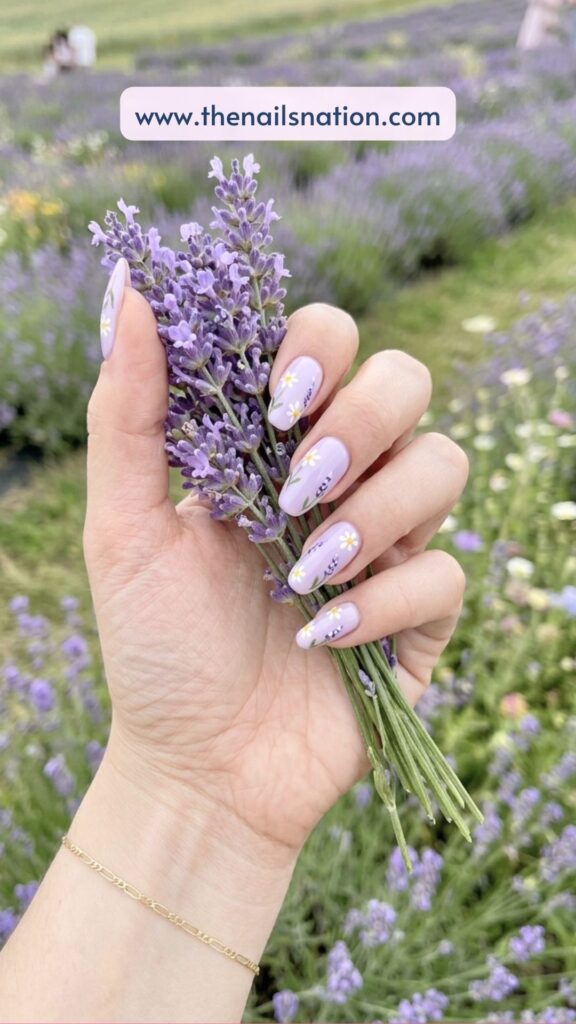
Tutorial:
- Apply lilac, lavender, or deeper purple polish.
- Add white daisy details carefully using a dotting tool.
- Place flowers near corners or diagonally across the nail.
- Keep the overall design soft and balanced.
- Seal with glossy top coat.
🌼 Almond-shaped nails make this look even prettier.
Ombre Daisy Nails
Ombre daisy nails are for the girls who want something extra dreamy. The blended colours underneath the flowers make the entire manicure feel soft, layered, and super aesthetic.
The gradient effect adds depth without making the nails feel too busy, which is why this style works so well for spring and summer.
It’s giving Pinterest wallpaper energy in the best way.
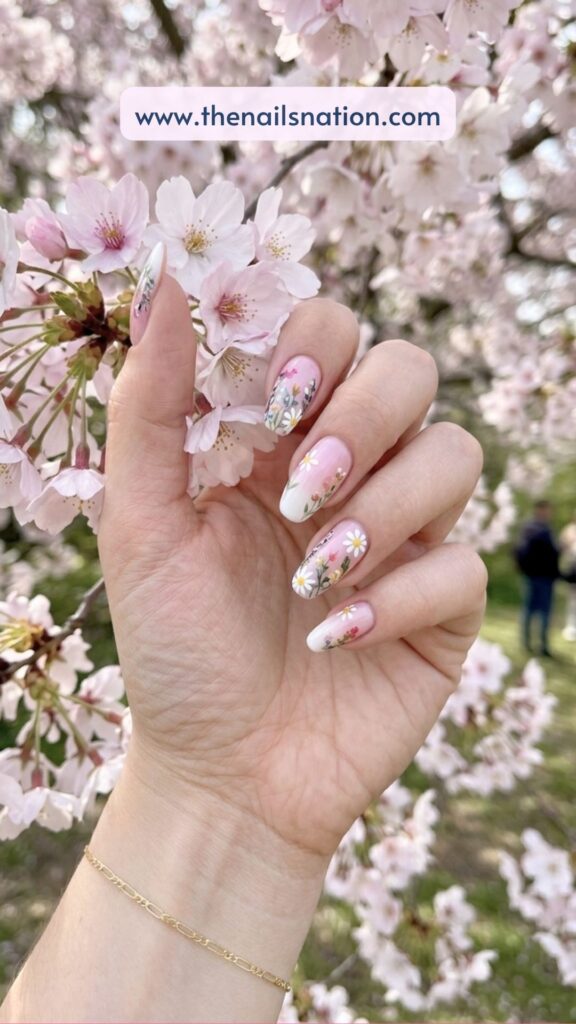
Tutorial:
- Apply two polish shades onto a sponge.
- Dab gently onto nails to create an ombre blend.
- Let the gradient dry fully.
- Add daisy art over the top.
- Seal with glossy top coat for a smooth finish.
🌼 Soft pink-to-white ombre works perfectly with daisies.
Pink spring nails also work best in the spring season.
Glitter Daisy Nails
A little sparkle makes everything cuter, and glitter daisy nails prove it instantly ✨
The shimmer catches the light beautifully while still letting the floral details stay the main focus. It’s playful without feeling over-the-top.
These nails are especially cute for vacations, birthdays, festivals, or, honestly, romanticising your everyday life.
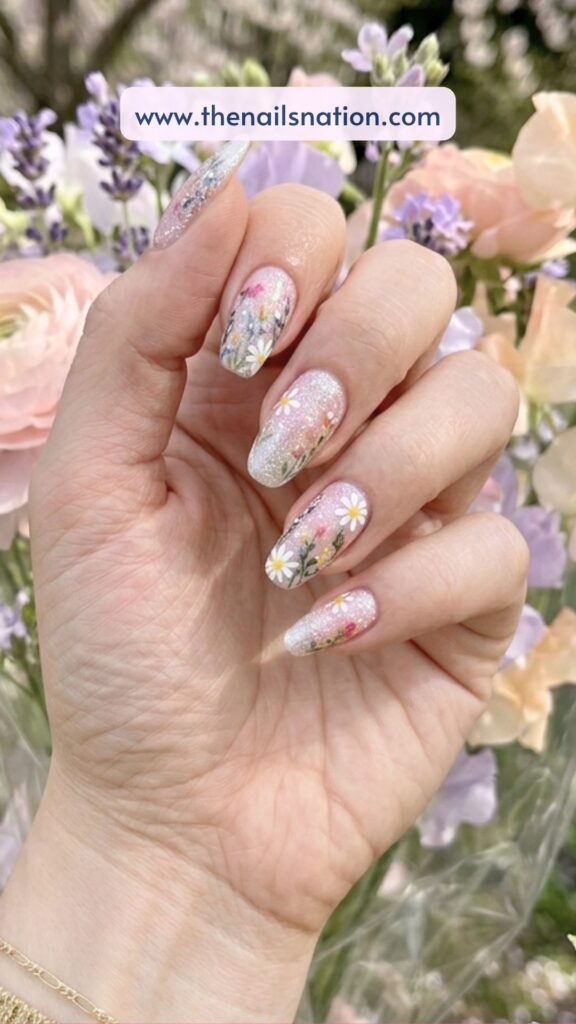
Tutorial:
- Apply your base colour normally.
- Add glitter polish or loose glitter strategically.
- Paint daisies over the glitter or beside it.
- Keep sparkle concentrated on accent nails if desired.
- Finish with a glossy top coat.
🌼 Fine glitter looks more elegant than chunky glitter for this style.
Spring Daisy Nails
If spring could turn into a manicure, it would literally be spring daisy nails 🌸
Fresh colours, tiny flowers, soft details – everything about this style feels light and happy. These are the nails that instantly make you want to sit outside in the sun with an iced drink and take pictures of your hands for no reason.
The vibe is playful, feminine, and super wearable.
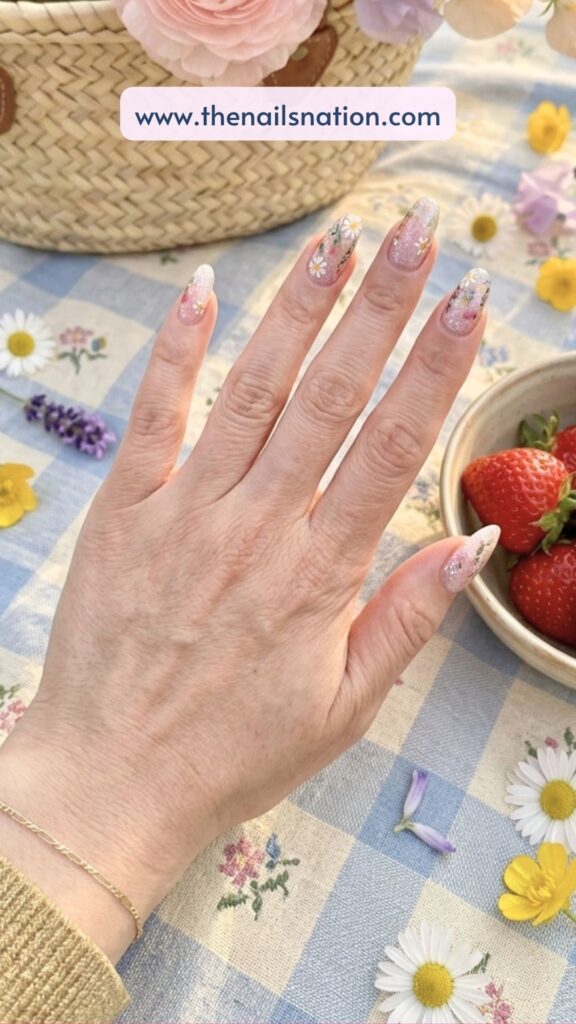
Tutorial:
- Use soft seasonal shades like pastel pink, peach, mint, or sky blue.
- Add small daisy details across accent nails.
- Keep flower placement airy and spaced out.
- Add subtle dots or tiny floral accents for detail.
- Seal everything with a glossy top coat.
🌼 Mixed pastel nails make this look feel extra spring-coded.
Almond Daisy Nails
There’s just something about almond-shaped nails that makes every design look instantly prettier – and when you add daisies? It’s over. The shape feels elegant and soft, while the floral details make everything look playful and feminine.
These nails have that “Pinterest cool girl” energy where the manicure looks polished but still effortless. The slightly elongated shape also gives the daisy designs more room to flow naturally rather than feel crowded.
And honestly, almond nails make your hands look SO good in photos.
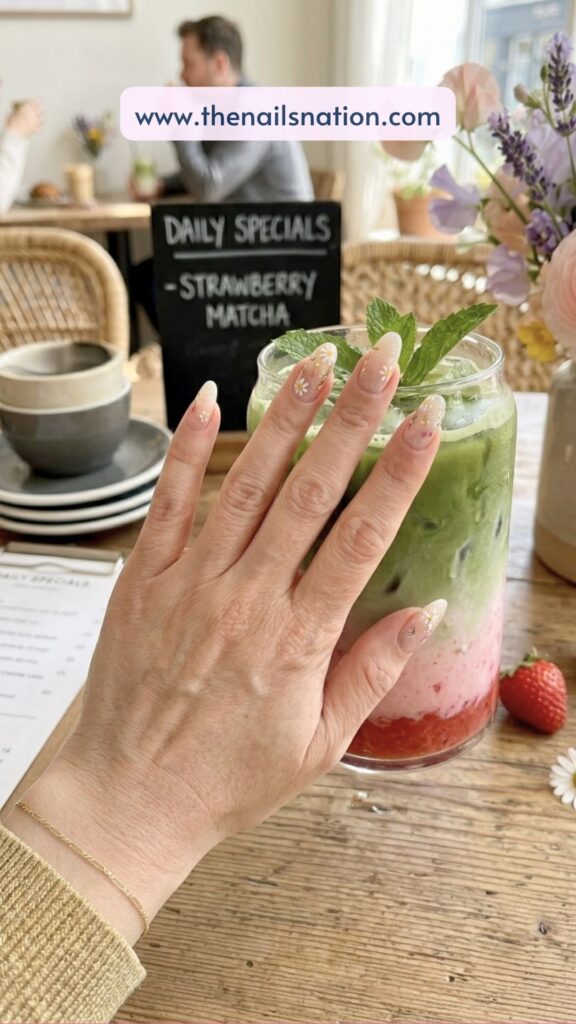
How to recreate:
- Shape nails into a soft almond silhouette using a nail file.
- Apply your chosen base colour – soft pinks, milky whites, or pastels work beautifully here.
- Add daisy designs diagonally across the nail for a more elegant layout.
- Keep some negative space so the design feels airy instead of heavy.
- Finish with a glossy top coat for that smooth salon shine.
🌼 Tiny daisies near the tips look especially pretty on almond shapes because they follow the curve naturally.
Cute Floral Nails
If you can’t stop saving flower nail inspo, cute floral nails are basically your dream manicure. Instead of sticking to only daisies, this look mixes tiny florals together to create something playful, colorful, and super detailed.
The best part about this style is that it feels fun and creative without needing to look “perfect.” A few mismatched flowers actually make the manicure feel even cuter and more natural.
It’s giving picnic blanket, fresh flowers, and spring playlist energy 🌸✨
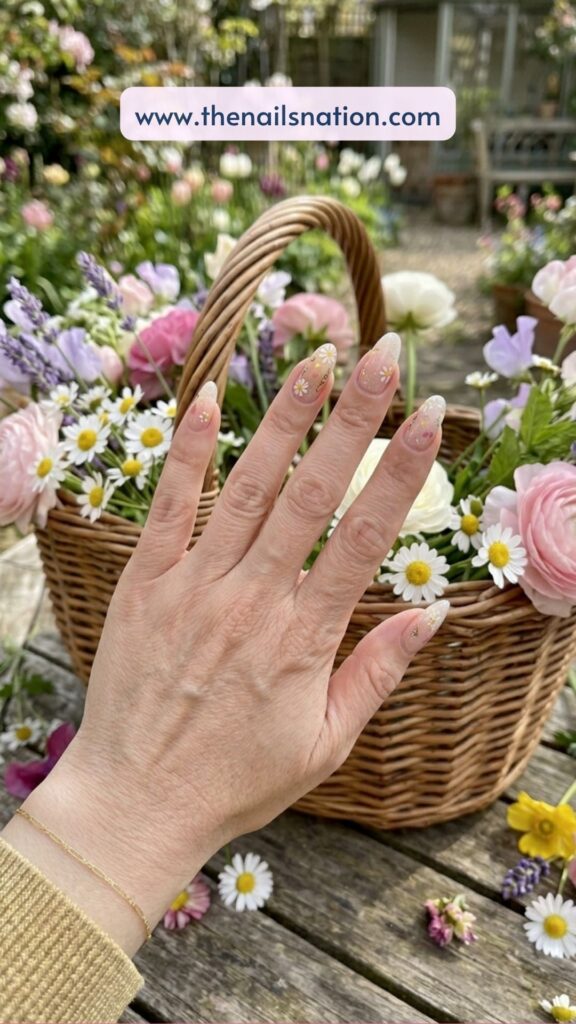
Tutorial:
- Start with a soft or pastel base colour.
- Add daisies first, then mix in tiny flowers like tulips or mini petals.
- Use multiple pastel shades for variety.
- Scatter the designs unevenly so it feels organic.
- Finish with a glossy top coat to blend everything.
🌼 Keeping all the flowers tiny prevents the nails from looking overcrowded.
Aesthetic Daisy Nails
You know those nails that instantly look like they belong on a perfectly curated Pinterest board? Yeah – that’s exactly the vibe of aesthetic daisy nails 🌿
These designs feel soft, muted, and intentionally minimal. Nothing is too bright or overdone. Instead, everything works together quietly — the colors, the tiny flowers, the placement.
It’s very “clean girl meets artsy girl.”
And honestly, this style works year-round because it feels timeless instead of trendy.
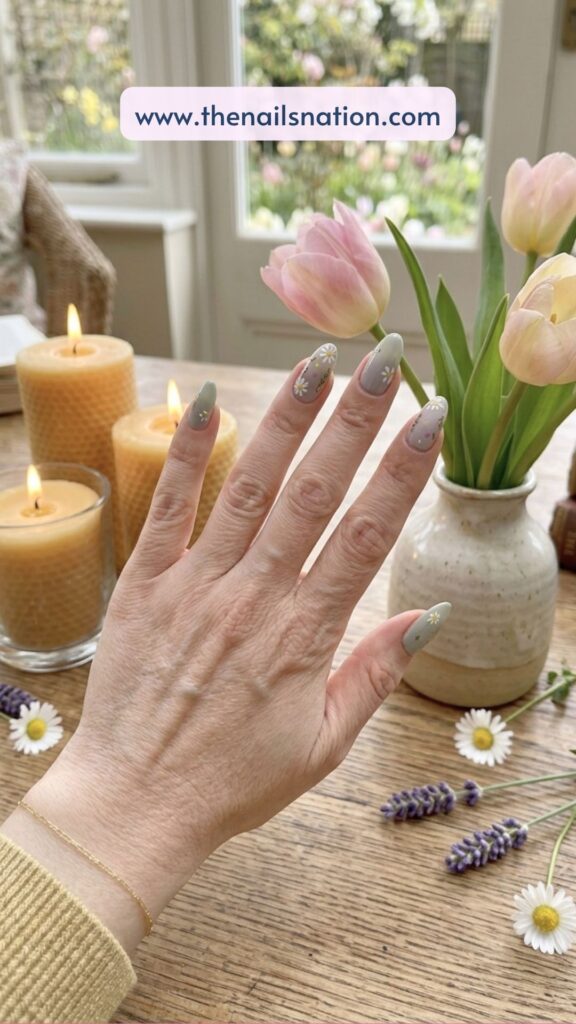
Tutorial:
- Choose muted tones like sage green, dusty pink, soft beige, or milky white.
- Add tiny daisy details with lots of spacing between them.
- Keep the flowers small and delicate.
- Leave some negative space visible for a cleaner look.
- Finish with either glossy or matte top coat, depending on the vibe you want.
🌼 Matte top coat makes aesthetic nails feel even softer and more editorial.
Colorful Daisy Nails
If soft neutrals aren’t your thing, colourful daisy nails are SUCH a fun alternative. These nails feel bold, playful, and instantly mood-boosting without losing that cute floral vibe.
The bright colours make the daisies pop even more, and the overall manicure feels energetic in the best way possible. It’s the kind of design that stands out immediately when you’re scrolling Pinterest.
And honestly? These nails just make people happy.
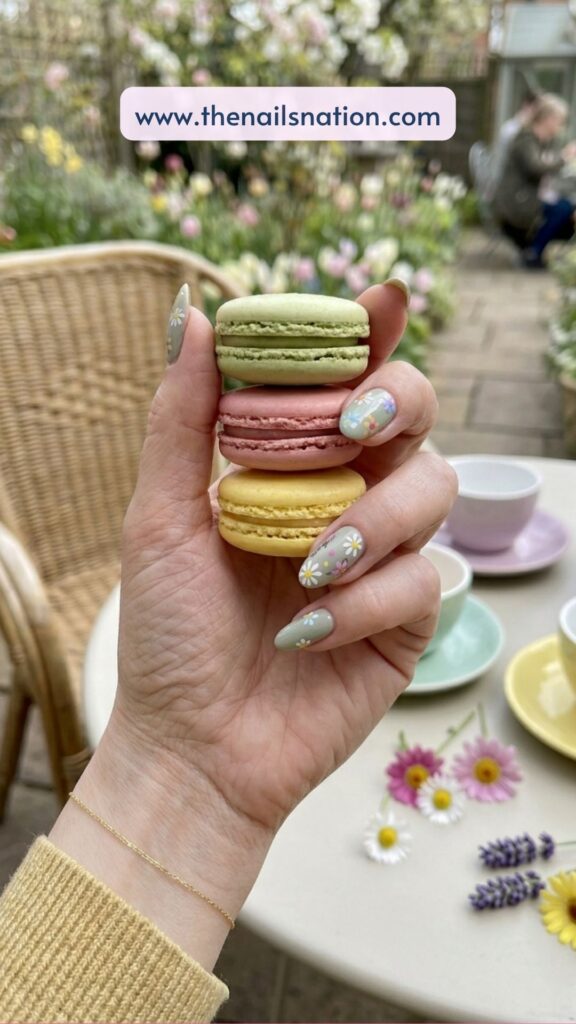
Tutorial:
- Paint every nail a different bright or pastel colour.
- Add daisies using contrasting shades so they stand out clearly.
- Mix flower sizes slightly for a more playful effect.
- Keep the design balanced by spacing details evenly.
- Seal everything with a glossy top coat.
🌼 Rainbow pastel combinations look especially cute for spring and summer.
Accent Nail Daisy Design
Sometimes one nail is all you need 💫
Accent nail daisy designs are perfect if you want floral nails without committing to full nail art on every finger. The contrast between simple nails and one detailed floral accent makes the entire manicure feel more elevated and intentional.
It’s stylish, easy to wear, and honestly, one of the best options if you’re trying floral nails for the first time.
Plus, accent nails always look super clean in photos because the design has room to stand out properly.
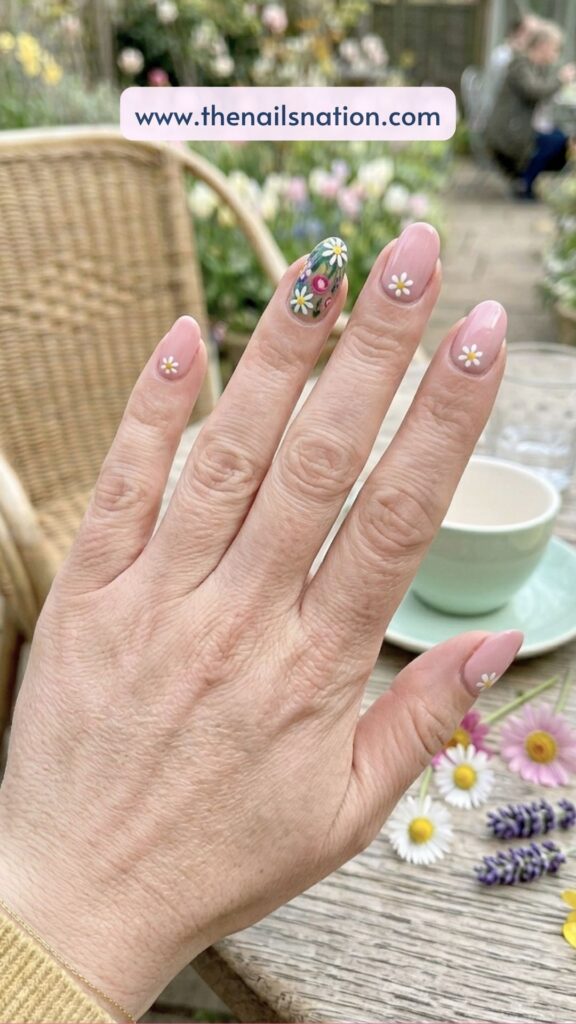
Tutorial:
- Paint most nails a solid colour of your choice.
- Pick 1–2 nails for daisy art.
- Create tiny white petals with yellow centres on the accent nails only.
- Add extra dots or tiny details if desired.
- Finish with a glossy top coat for a polished finish.
🌼 Ring finger accent nails still look the cutest for floral designs – some things never change.
Daisy nails seriously never get old 🌼✨
They’re soft, playful, feminine, and somehow work with literally every aesthetic — minimal, glossy, bold, dreamy, clean girl, Pinterest-core… all of it. And the best part is how customizable they are. Tiny daisies, colourful daisies, glossy florals, matte details — there’s always a new way to make the trend feel fresh again.
These are the kind of nails that instantly make your hands look prettier without needing anything overly complicated. Cute enough for screenshots, wearable enough for everyday life.
So now the hardest part is honestly just picking ONE design 💅
Save your favourites, send them to your nail tech, and prepare for everyone asking where you got your nails done 🌸